
How to Sew Scrappy Fabric Pumpkins
- Laura Kasowitz
- Oct 15, 2020
- 5 min read


I don't love decorating for Halloween (I don't even really love Halloween but that isn't a very popular opinion so it's one I often keep to myself!). However, I can get behind a good autumnal decoration and I'm always looking for a project that uses up scraps. We create A LOT of scraps at the studio so the scrappier a project the better. These little pumpkins check all those boxes and they're quick to sew (after you've done the first one and get the hang of it) so you'll be busting your scrap bin in no time!
If you want to watch the full video tutorial you can check it out here:
If you prefer skimming through the steps with a couple of quick instructions then keep on reading!
Let's start with the basics...
Skill Level: Beginner. You should know how to measure and cut thread, set up a sewing machine and sew a straight-ish line. (Need help with that? Check out our Kids Learn to Sew E-course-- good for all ages!)
Materials:
- 6 scraps quilting cotton cut to 4"w x 7"h
- scraps of felt for the leaves
-stuffing
-polyester thread
-cinnamon stick or regular stick for the stem
Tools:
-Measuring:
-Clear grid ruler (my personal fave) or regular 12" ruler
-seam gauge
-Cutting:
-Fabric scissors
-Paper scissors
-Thread snips
-Seam ripper
-Tailor's chalk or disappearing fabric marker
-Handsewing Needle
-Straight Pins
-Iron and ironing mat or board
-Sewing Machine

STEP 1: MEASURING AND CUTTING
Cut your quilting cotton to 6 pieces that are 4" x 7".

2. Using the leaf pattern, cut out at least 4 leaves and one center circle from the felt.

STEP 2: PINNING AND SEWING
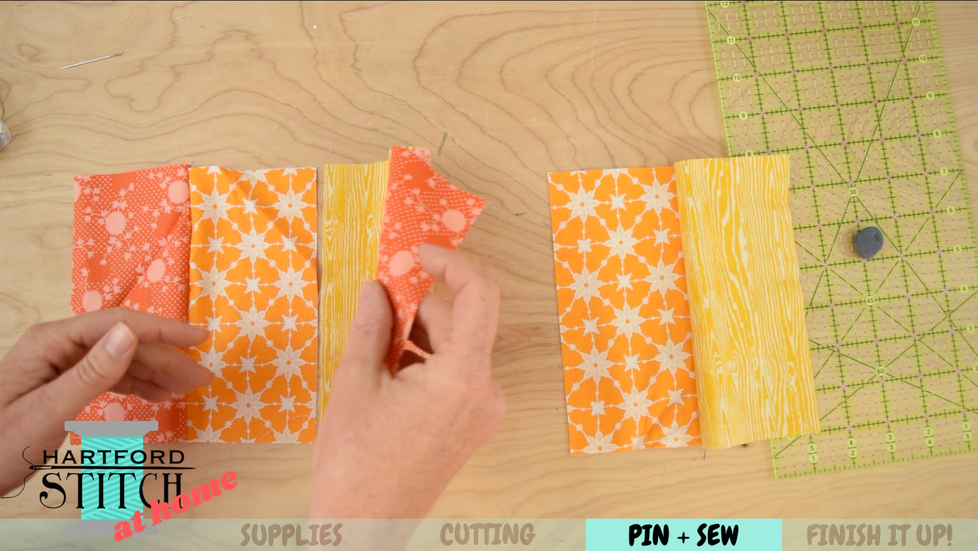
We will eventually be sewing a big tube, but first we need to sew all the pieces flat. Layout all of your rectangles with the Right Sides (pretty sides) facing up and the short sides at the top and bottom. We're going to start by sewing together the two pieces in the middle.

2. Looking at the center pair of fabric pieces, flip the right hand rectangle over on top of the left hand rectangle. The Right Sides will be facing each other and the right edges lined up.

3. Line up your ruler so the 1/2" mark is on the raw edge and draw a line. This will be our sewing line.

4. Place 2 pins to the left of the line.
- Repeat with all of the remaining pairs.

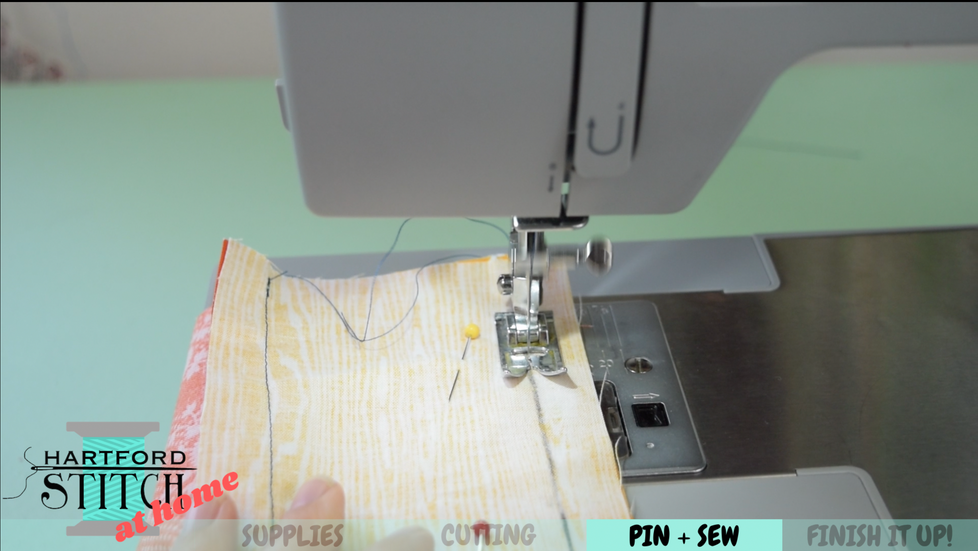
5. Head on over to your machine and make sure it's set up to a straight stitch, medium stitch length, no stitch width and your tension is at a 4 or auto (basically your general sewing settings!).
-Sew along each line remembering to back stitch at the beginning and end. Repeat for all the pairs.

6. Back at your prep table, open up each pair and lay them back out in order.
-Flip and stack the first two together so the wrong sides are together and the right edges are lined up.
-Draw your sewing line.
-Pin together. (We're just worrying about those first two pairs for now).
-Sew along that line-- remember to backstitch!


7. Head on back to your prep table and repeat that last step with the third pair. After sewing you should have one long strip.
-Using your iron, carefully press the seams flat.

8. Using your seam gauge, make a mark 1/2" in from each edge (there should be 4 marks).

9. Back at your sewing machine, set your stitch length to the longest stitch (highest number). We are going to sew 2 parallel lines between the marks on the long side. Don't backstitch and leave long thread ends for later!

10. Now let's make that fabric tube! Pull the thread ends away and fold the fabric so the right sides are together and the short ends are lined up.
-Draw your sewing line at 1/2"
-Pin
-At your sewing machine, switch back to a regular stitch length. Sew along your sewing line. Remember to backstitch!

12. Let's put those long stitches to work and gather the fabric along the threads at the bottom of the pumpkin.
-Find the thread ends on the wrong side of the fabric on one long side of the pumpkin.
-Carefully begin squishing the fabric along the thread.

13. Keep squishing until it's as squished as squished can be.
-Tie the threads into a knot to hold them in place.
-Snip your threads so they are only a couple of inches long.

14. Here comes a tricky part! We're going to sew between those parallel lines of stitching (or if your lines aren't so parallel, sew generally along the bottom). You can use a pencil or snips to help push the fabric along and keep your fingers out of harms way. Remember to backstitch!

FINISHING IT UP!
1. Turn your pumpkin right side out. It should look like a little bowl.
-Begin pulling the long threads on the other side to start gathering but don't pull it closed. Make a little cup out of it.
-Start stuffing the pumpkin. It's tempting but don't overstuff it because we still need to cinch it closed.

2. Finish gathering the fabric as tight as it can go (be careful not to break the threads!) and tie a knot to secure it.

3. Trim your felt circle so it fits on top of the pumpkin and overhands the basting stitches just by a little.
-Fold the felt in half and make a tiny snip in the middle. This will be the hole for our stick.


4. Center the felt on top of the pumpkin and pin into place.
-Thread a needle and tie a knot. We're going to whipstich the circle into place.
-Take a stitch through the pumpkin, right under the felt circle and up through the felt.
-Bring the needle back down to the pumpkin, make a stitch and go up through the felt.
-Keep on stitching all the way around.


5. To tie a knot go to make another stitch but instead of pulling the thread all the way through, bring the needle back through the loop. Pull tight and repeat.

6. The final hurrah: the leaves! Layout the leaves how you want them and pin into place.
-Thread your needle and tie a knot. We're going to do a running stitch this time.
-Start as you did for the circle by going into the pumpkin and up through the felt.
-Then catch the felt like in the first two photos below. Keep on working your way around the top of the pumpkin. Every leaf should have at least one stitch through it.
-Tie a knot in the same way and clip the thread close.


7. Stick in your cinnamon stick or stick stick and you're done!

If any of these directions trip you up remember that there is a full video with lots of little details in it available here! These are so much fun that once you make one you're not going to want to stop.
And if all of this seems a little overwhelming to you then make sure to check out our Kids Learn to Sew E-Course to get you started!

Now that you know you're going to want to make a million more, here are a couple of things to think about for your next one:
-How could you change the dimensions to make a wider pumpkin? A taller pumpkin? a bigger pumpkin?
-What kinds of fabric could you use to make it? Old plaid shirts? Jeans? Velvet? What would be the advantages and disadvantages to the thicker fabric?
Not ready to sew on yet? Make sure to pin this for later!

I would love to see what you make so please be sure to tag @hartfordstitch on social media or send me a photo at laura@hartfordstitch.com.

Happy Stitching!
Laura


Comments