
Preschool Sewing: Monster Softie
- Laura Kasowitz
- Jul 21, 2017
- 3 min read
After weeks of watching me make camp samples, my 5 year old and 3 year old couldn't stand it anymore and were begging me to let them sew something. Not just something, they wanted to sew stuffed animals (might as well aim high, right?).
I gave them some paper and asked them to sketch out what they wanted. I immediately realized this was going to be worth documenting and grabbed my phone. It was a rainy day, and my sewing room at home has pretty bad light to begin with, so these photos are a little rough, but the steps are all here!
My kids have 3 requirements for any sewing project: Buttons, a Fun Stitch on the sewing machine and, ideally, stuffing. No surprise, my 5 year old brought it down to his essentials (see the holes in the button eyes?) and designed these monsters. The 3 year old picked out the fabric.
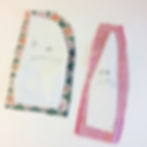
Step 1: Put two scraps of fabric, the size of your monster, right sides together. Pin the monster in place (if you're feeling ambitious) and roughly cut about 1/2" outside the template to allow for a seam allowance.

Step 2: Let the kids loose in the button jar to pick out eyes. The 5 year old had a little concern that the buttons he drew had holes but the button he picked had a shank. I assured him it would be okay. Normally I'd say to put a dot for where you want your button to go, but that's overkill for this project so just pick a spot on the right side of the fabric and sew it on.

Quick Tip: When giving kids a needle and thread your first instinct may be to double up the thread and tie a knot so the needle doesn't slip off. This is great until your child forgets that a needle goes up and down through the fabric and not around and around. You can't back a stitch out easily without cutting the thread if they do. Instead, tie a single knot around the eye of the needle that can easily be loosened if you need to rip back stitches.

Step 3: Time to sew on the mouth. Using whatever fun stitch they feel like, let them sew a mouth on to the front piece. Now, my kids have a fair amount of sewing machine experience for their ages. They know all the steps to run the machine and we go over safety a lot so I feel comfortable giving them their independence with this part. Do what feels right to you and hover as much as you need to.

Another Quick Preschool Sewing Tip: Little legs can't reach the floor! I use a box and a piece of rubber shelf liner (you can buy it at the dollar store or a home improvement store) so the pedal doesn't slip. Check out that heel on the "floor" and toes on the pedal--- I'm one proud Sewing Teacher/Mama here!

Step 4: Place the two monster pieces Right Sides together, pin and sew. This part I always help my kids with because keeping an even-ish seam allowance can be tough for any new sewist. Make sure you leave a gap at the bottom. Make sure you leave a bigger gap than my daughter left here. Nobody is turning anything through that gap.

Step 5: Clip any corners or curves.

Step 6: Turn right side out. The kids will start to get VERY excited around now. "Why?" you ask?

Step 7: Because now they stuff. Once it's stuffed, turn in the raw edges and pin. If you're not comfortable with your kiddo and a straight pin, you can always use a safety pin.

Step 8: Using a whipstitch have them sew the gap closed. The term "whipstitch" is applied loosely here but it gets the job done!

Ta-Da! Monster Completion. I'm still kind of in awe of how closely these resemble the sketches. Like I said before: it was down to the essentials for my kids. Of course they immediately started planning their next project. I'm not sure who they picked that up from.....
Happy Stitching!
Laura

